Installing Moodle Guide on Debian Based Linux
Get 1000000 0FP0EXP Token to remove widget entirely!
Get 500000 0FP0EXP Token to remove my NFTS advertisements!
Moodle Brief Introduction
Moodle is one of the most popular learning management system (LMS) that provides online learning services. Student’s read materials, conduct discussions, submit assignments, and attempt quizzes from outside the class and on the other side, teachers can provide materials, grade, evaluation, and other forms of management. Moodle does not necessarily have to replace traditional face to face learning but can be blended to make tradional learning more convenient just as implemented on the Universities that I graduated from which are Udayana University and Kumamoto University.
As technology advances, online and distant learning is no longer exclusive to big institutions with specialized technicians. Today, everybody can try and install Moodle in their computers and experiment their own local computer based learning. No special skill is needed but just some experience working with servers and web based applications. In fact, we do not need those skills since the installation guide is available here. For now, the Moodle installation here is in Ubuntu Linux as it is the most popular operating system (OS) for servers for general users. If you have not install Ubuntu or other Debian based Linux, you can follow my previous guide or wait for my future guide in Windows.
Installing The Server
Before anything else, make sure the Debian Linux is updated by entering the following command in terminal:
sudo apt update && sudo apt full-upgrade
There are three main packages needed to install the server:
- Web Server (Apache2 is used here)
- Database Server (MySQL is used here)
- PHP language packages
Use any web server and database server you want. Here Apache2 and MySQL is used because they are the most popular among general users. The following packages are enough for Moodle installation today:
sudo apt install apache2 mysql-server php php-mysql php-xml php-curl php-zip php-gd php-mbstring php-xmlrpc php-soap php-intl
If the packages above are not found then ask your OS’s community for similar packages for example maybe php-mysql does no work but php7.0-mysql does. If you do not like using command line then bear with me with just one command line to install a graphical user interface (GUI) package manager Synaptic if your distribution does not have a built-in one:
sudo apt install synaptic
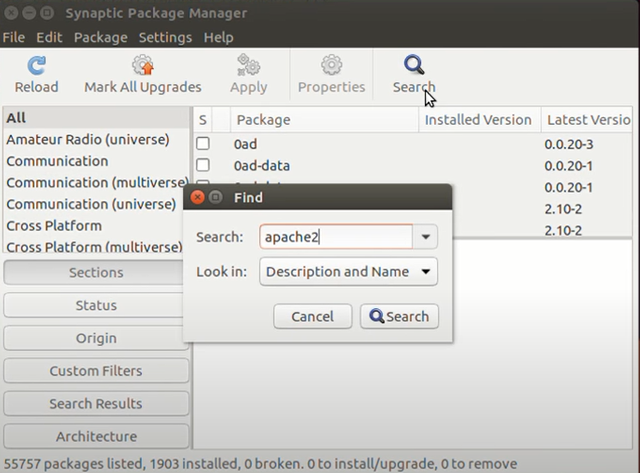
Search whatever your GUI package manager is in the search menu, open, and install the above packages such as apache2, mysql-server, and php.
If the servers are not automatically started, then enter the following commands:
sudo service apache2 start
sudo service mysql start
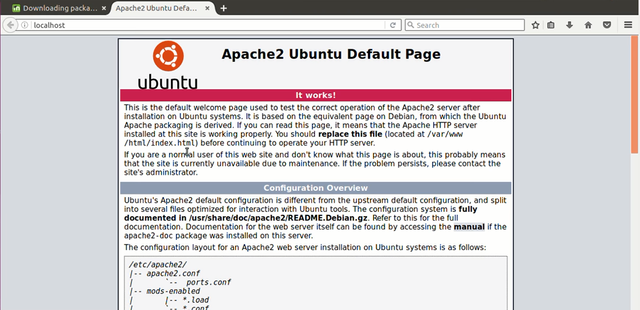
If everything went well, open your browser and enter https://localhost or https://127.0.0.1 and your default local web page will appear. If you are connected to a network, ask your friend to enter your IP address on the browser. This guide does not provide networking steps and if you need it, go to my previous guide.
Installing Moodle
Downloading and Placing the Files
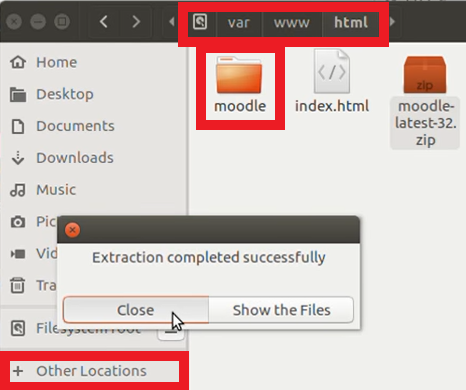
The contents of your local web server are in /var/www/html where if you want to add more contents, add them to that directory. For example you want add your sample .html page, you can them to /var/www/html/mysample.html and then open https://localhost/mysample.html. You can also add new direcotory for example /var/www/html/mydirectory and then open https://localhost/mydirectory. Therefore, all you need to do is to download the Moodle files on their website, extract them if the are archived, and put the folder containing the files into /var/www/html/. For example, mine is /var/www/html/moodle.
Before that, /var/www/html and its surrounding directory can only be modified by administrator account or root. Either do them in the terminal or open your filemanager using root for example mine using nautilus file manager:
sudo nautilus
In summary:
- Download the Moodle files on their website.
- Extract the files which should be one folder containing many files.
- Open file manager as root or use terminal or command line.
- Copy or move the Moodle folder into /var/www/html
If you know how to use git, this step is preferred.
Moodle is ever developing and it is easier to upgrade it using git rather than downloading the new version everytime and cleaner than upgrading from the web browser. Feel free to skip this step if you want and follow the previous but if you want long term convenient management then get moodle from git:
sudo apt install git
cd /var/www/html
sudo git clone git://git.moodle.org/moodle.git
cd moodle
sudo git branch -a
sudo git checkout (your preferred version which is usually the latest for example:)
sudo git checkout MOODLE_310_STABLE
Moodle Web Installation
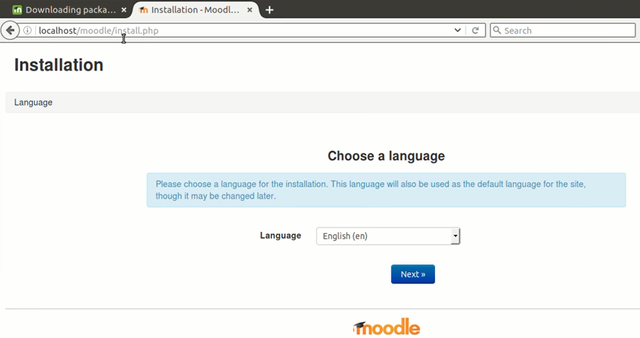
To proceed with web installation, open https://localhost/yourmoodlefolder where mine is https://localhost/moodle or if you are from a network https://youripaddress/moodle or https://yourdomainname/moodle.
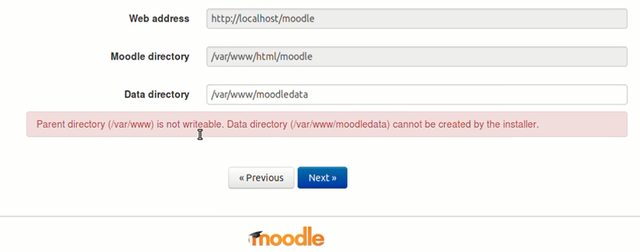
The first problem that I encounter is that it cannot create moodledata at /var/www. I know three solutions:
Right click /var/www directory, properties and change the permission to allow all (not recommended) or:
sudo chmod 777 /var/www
Right click /var/www directory, properties and change ownership and group to www-data (not my best) or:
sudo chown www-data:www-data /var/www
Create moodledata folder in /var/www directory manually, right click moodledata, properties and change ownership and group to www-data (my best solution) or:
sudo mkdir /var/www/moodledata
sudo chown www-data:www-data /var/www/moodledata
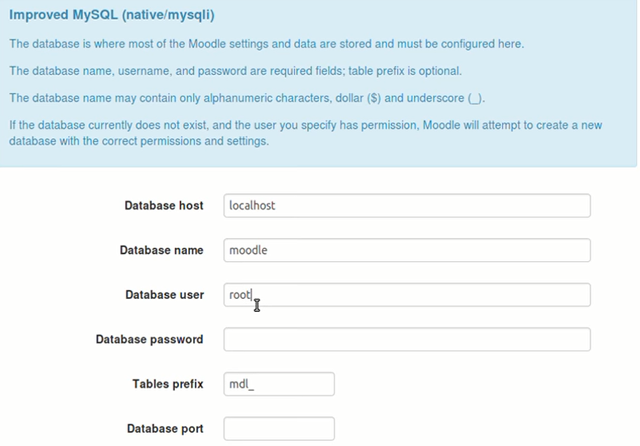
In this guide, the database is in one machine, therefore the database host is localhost or 127.0.0.1. If the database is in another machine then insert the ip address or domain name. The database name is whatever you like, I leave it to moodle, just remember the name. Database user and password can either be the admin user or advance user creates a separate user for security. If what you write does not work, then either your forgot and write it wrong, or using a database that does not support the default admin user where the solution is to create a new user for it through terminal mysql -u root or try install phpmyadmin. Table prefix is also whatever you like. You can leave the port empty where the default port 3306 is used or specify your configured port. You can leave Unix socket empty or your specified one.
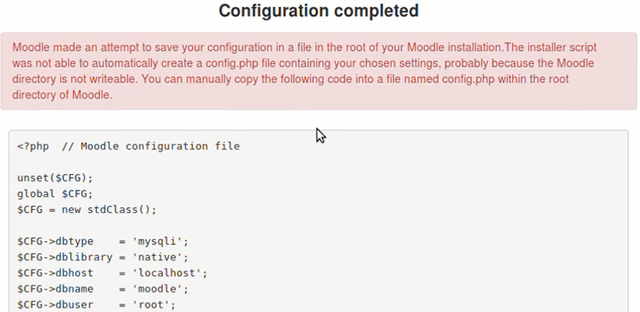
You will be given a configuration script but you may encounter a problem that it cannot write in the directory due to permission problem where the solution is either:
Right click /var/www/html/moodle directory, properties and change the permission to allow all (not recommended) or:
sudo chmod 777 /var/www/html/moodle
Right click /var/www/html/moodle directory, properties and change ownership and group to www-data (not recommended either) or:
sudo chown www-data:www-data /var/www/html/moodle
Create config.php file in /var/www/moodle directory manually, right click config.php, properties and change ownership and group to www-data and after installation, return the ownership to root (not the best) or:
sudo touch /var/www/moodle/config.php
sudo chown www-data:www-data /var/www/moodle/config.php
(after installation:)
sudo chown root:root /var/www/moodle/config.php
Create config.php file in /var/www/moodle directory manually, edit config.php and paste the script shown on the installation (the best solution) or:
sudo (your preferred editor) /var/www/moodle/config.php
(mine is:)
sudo gedit /var/www/moodle/config.php
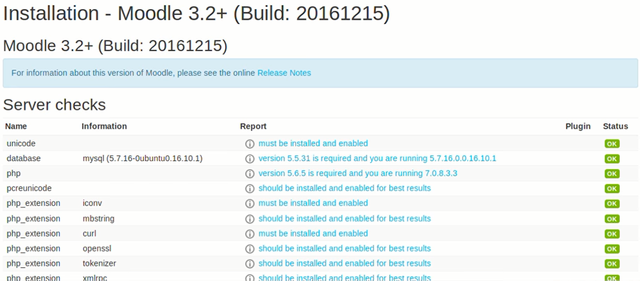
If everything is well than everything is green. If not, install the missing packages, or click the warnings or errors and you will be redirected to suggestions of how to solve it. After successful installation, all you need to do is to explore yourself.
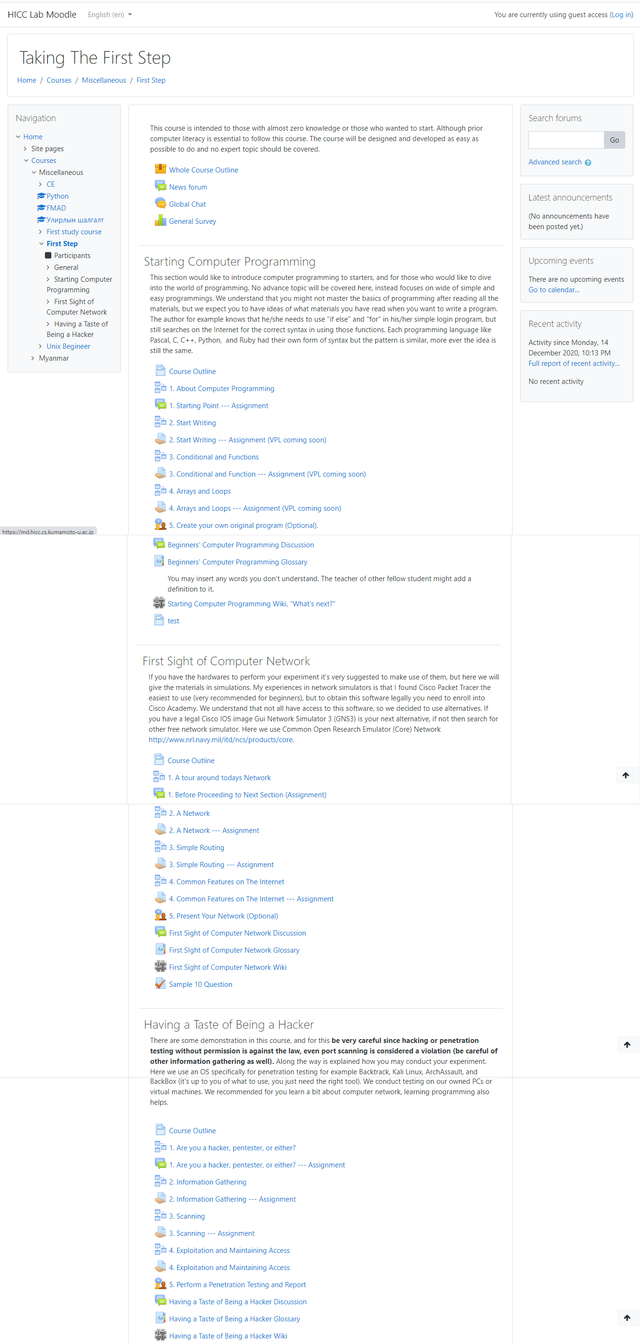
Here is a screenshot of my created course on https://md.hicc.cs.kumamoto-u.ac.jp/course/view.php?id=6.
Video Guide
If you are missing some details, maybe my videos can help you with timestamp available. Installation takes 30 minutes and the rest are exploration post installation.
Mirrors
- https://www.publish0x.com/0fajarpurnama0/installing-moodle-guide-on-debian-based-linux-xnqlwxj?a=4oeEw0Yb0B&tid=github
- https://0darkking0.blogspot.com/2020/12/installing-moodle-guide-on-debian-based.html
- https://0fajarpurnama0.medium.com/installing-moodle-guide-on-debian-based-linux-3c61ae3e085
- https://0fajarpurnama0.github.io/internet/2020/09/24/installing-moodle-guide-debian-based-linux
- https://blurt.buzz/blurtech/@fajar.purnama/installing-moodle-guide-on-debian-based-linux?referral=fajar.purnama
- https://stemgeeks.net/technology/@fajar.purnama/installing-moodle-guide-on-debian-based-linux?ref=fajar.purnama
- https://steemit.com/technology/@fajar.purnama/installing-moodle-guide-on-debian-based-linux?r=fajar.purnama
- https://hicc.cs.kumamoto-u.ac.jp/~fajar/internet/installing-moodle-guide-debian-based-linux
- https://0fajarpurnama0.wixsite.com/0fajarpurnama0/post/installing-moodle-guide-on-debian-based-linux
- http://0fajarpurnama0.weebly.com/blog/installing-moodle-guide-on-debian-based-linux
- https://0fajarpurnama0.cloudaccess.host/index.php/13-computers-and-internet/143-installing-moodle-guide-on-debian-based-linux
- https://read.cash/@FajarPurnama/installing-moodle-guide-on-debian-based-linux-a9e796b9
- https://www.uptrennd.com/post-detail/installing-moodle-guide-on-debian-based-linux~ODMyNTI3